
Blog
Dhaba-Style Mixed Vegetable Curry
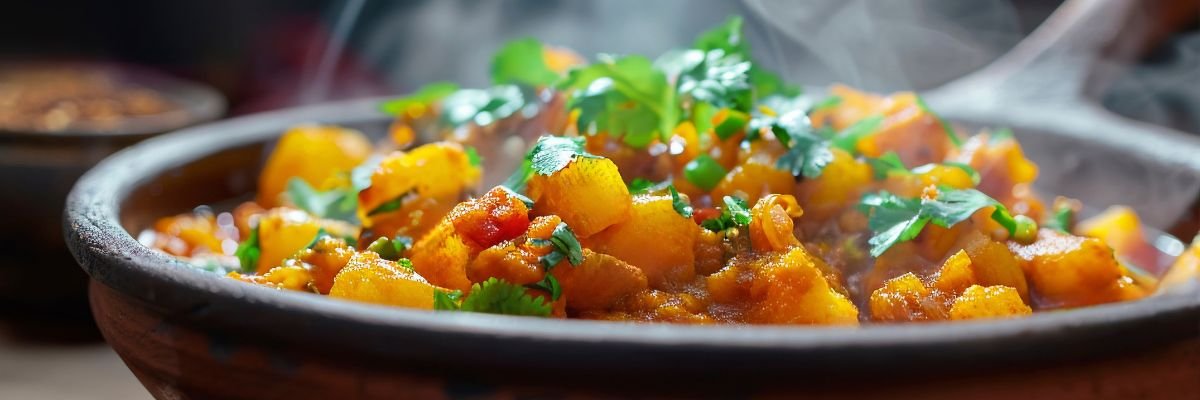
1. Introduction — What is Dhaba Style Mixed Veg Curry?
- Dhaba-style dishes are known for their bold flavors, rustic texture, and rich aroma.
- This Mix Veg Curry captures the authentic roadside dhaba taste using simple frozen mixed vegetables.
- The curry is creamy, slightly spicy, and cooked with onions, tomatoes, ginger-garlic, butter, and aromatic spices.
- Perfect to serve with roti, naan, paratha, jeera rice, or steamed rice.
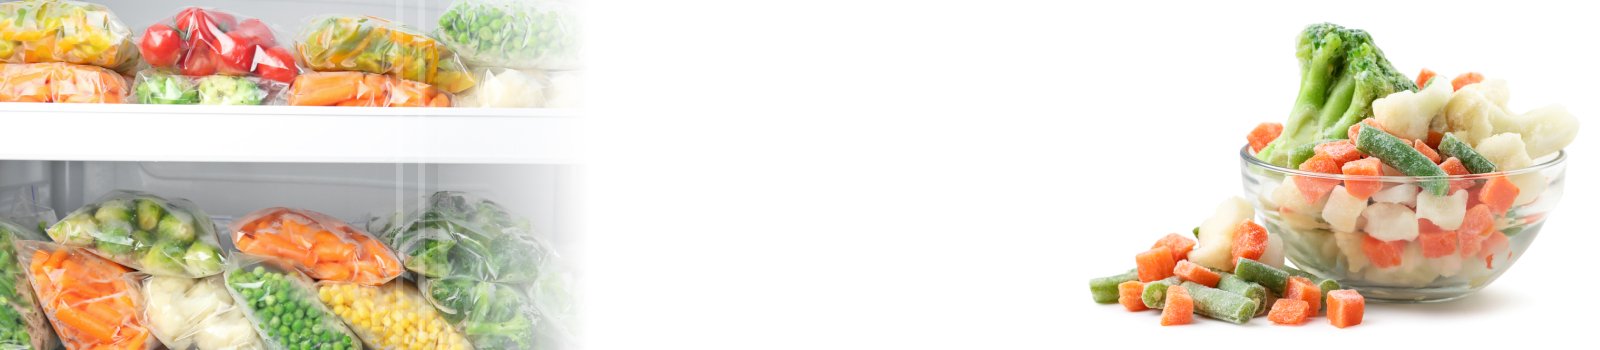
- Frozen mix vegetables like carrots, beans, peas & cauliflower make this recipe extremely convenient and consistent.
- The recipe uses restaurant-style cooking methods like slow-frying masalas, layering spices, and finishing with cream or butter.
2. Ingredients (Point-Wise & Easy to Follow)
Vegetables
- 2 cups Frozen Mixed Vegetables
(carrot, beans, peas, cauliflower) - ½ cup Frozen Green Peas (optional but recommended)
- 1 medium onion (finely chopped)
- 2 medium tomatoes (pureed)
- 1 green chili (slit)
Aromatics
- 1 tbsp ginger-garlic paste
- 1 tbsp butter (for dhaba taste)
Whole Spices
- 1 bay leaf
- 1 cinnamon stick
- 3–4 cloves
- 3 cardamom pods
- 1 tsp cumin seeds
Powder Spices
- 1 tsp turmeric powder
- 1 tsp red chili powder
- 1 tsp coriander powder
- ½ tsp garam masala
- ½ tsp crushed kasuri methi
- ½ tsp black pepper
- 1 tsp kitchen king masala (optional but gives dhaba taste)
- Salt as required
Liquids
- 3 tbsp oil
- ½ cup water (or more depending on gravy thickness)
- 3 tbsp fresh cream OR ¼ cup milk (for creaminess)
Garnishing
- Coriander leaves (finely chopped)
- ½ tsp lemon juice (optional)
3. Equipment Required
- Deep kadhai or heavy-bottomed pan
- Spatula
- Knife and chopping board
- Bowl for vegetables
- Mixer grinder (for tomato puree)
- Measuring spoons
4. Preparation Steps (Before Cooking)
Step A: Prepare Frozen Vegetables
- Take 2 cups Frozen Mix Vegetables and rinse once to remove ice crystals.
- No need to boil them separately; they will cook in the gravy.
- Keep aside in a bowl.
Step B: Prepare Onion & Tomato Base
- Finely chop 1 medium onion.
- Puree 2 tomatoes in a blender (do not add water).
- Keep ginger-garlic paste ready.
Step C: Assemble Spices
- Keep whole spices, powdered spices, kasuri methi ready.
- Dhaba-style cooking requires quick addition of spices, so keep them organized.
5. Step-by-Step Cooking Instructions
⭐ Phase 1 – Heat Oil & Add Whole Spices
- Place kadhai on medium flame.
- Add 3 tbsp oil + 1 tbsp butter (this gives dhaba aroma).
- Once hot, add:
- 1 tsp cumin
- 1 bay leaf
- 1 cinnamon stick
- 3 cloves
- 3 cardamom pods
- Allow them to crackle and release fragrance.
- This sets the base for the classic dhaba-style flavor.
⭐ Phase 2 – Sauté Onions
- Add finely chopped onions.
- Sauté for 5–6 minutes until they turn golden brown.
- Do not rush; caramelized onions give color and richness to the gravy.
⭐ Phase 3 – Add Ginger-Garlic Paste
- Add 1 tbsp ginger-garlic paste.
- Sauté for 1 minute until raw smell disappears.
- Add slit green chili for mild heat.
⭐ Phase 4 – Add Tomato Puree
- Add tomato puree into the kadhai.
- Mix well.
- Cook for 5–7 minutes until oil starts separating from sides.
- This step is important—dhaba-style gravies are cooked slowly to deepen the flavor.
⭐ Phase 5 – Add Powdered Spices
Add the following spices:
- 1 tsp turmeric
- 1 tsp red chili powder
- 1 tsp coriander powder
- ½ tsp black pepper
- 1 tsp kitchen king masala
- Salt
Mix well and cook for 2–3 minutes until masala thickens and turns aromatic.
⭐ Phase 6 – Add Frozen Mixed Vegetables
- Add 2 cups Frozen Mixed Vegetables.
- Add the extra ½ cup Green Peas if desired.
- Mix well so the masala coats all veggies.
⭐ Phase 7 – Add Water & Slow Cook
- Add ½ to 1 cup water depending on desired gravy thickness.
- Stir gently.
- Cover with a lid and cook on low flame for 10–12 minutes.
- Frozen vegetables cook quickly, absorbing all the masala flavors.
⭐ Phase 8 – Add Cream & Dhaba Flair
After vegetables are cooked:
- Add 3 tbsp fresh cream OR ¼ cup milk.
- Add ½ tsp kasuri methi (crushed between palms).
- Add ½ tsp garam masala.
Mix softly and let simmer for 3 minutes.
You will see the gravy turn thick, silky, and dhaba-style rich.
⭐ Phase 9 – Final Balance of Flavors
- Taste the curry.
- Adjust salt or chili as needed.
- Add ½ tsp lemon juice if you want a slight tang.
- Add chopped coriander leaves.
⭐ Phase 10 – Resting Time
- Turn off flame and let curry rest for 5 minutes.
- This helps flavors deepen and become more balanced.
6. Serving Suggestions
Serve hot with:
- Butter roti
- Tandoori roti
- Garlic naan
- Plain naan
- Lachha paratha
- Jeera rice
- Veg pulao
- Steam rice
Dhaba-style curry tastes best with ghee rice, jeera rice, or soft chapatis.
7. Storage & Reheating
Storage
- Store in airtight box for 2 days in refrigerator.
- Cream-based curries should not be frozen (texture separates).
Reheating
- Add 2 tbsp water while reheating to refresh gravy.
- Heat on low flame for 3–4 minutes.
8. Nutrition per Serving (Approx.)
- Calories: 350 kcal
- Carbs: 28 g
- Protein: 7 g
- Fat: 15 g
- Fiber: 5 g
9. Chef Tips for Dhaba Taste
✔️ For Rich Flavor
- Use 1 tbsp butter along with oil.
- Slow-cook onions until golden brown.
✔️ For Smoky Aroma (Optional)
- Heat a small piece of coal until red.
- Place a steel bowl inside curry.
- Add hot coal + ½ tsp ghee.
- Cover pot for 2 minutes.
✔️ For Thick Gravy
- Add 1 tbsp cashew paste.
- Add more tomato puree if needed.
✔️ For Spiciness
- Add 1 extra green chili.
- Increase red chili powder quantity.
✔️ For Restaurant Texture
- Add 1 tbsp fresh cream before serving.